Cura and other slicing software (it “slices” the 3D model into layers for 3D printing) offers many options and provides you with estimates about print time and material use. I use PLA plastic for my prints. You can buy spindles of the filament in 1kg and 0.5kg weights. Whenever you slice a model, the software will estimate the material used by distance in meters and weight in grams. The Goku model I used for this experiment used about 120 grams of PLA. So I could print 8 figures from a single spindle. I paid $15 for a spindle, so that means each figure would cost about $1.88. Of course, I didn’t use the best printing settings, so the figure (as you will see) isn’t terribly smooth. The better your print settings, the more time and filament the print consumes. But compared to the price of most anime figures, you will still come out ahead. Plus the painting and modeling process is fun!
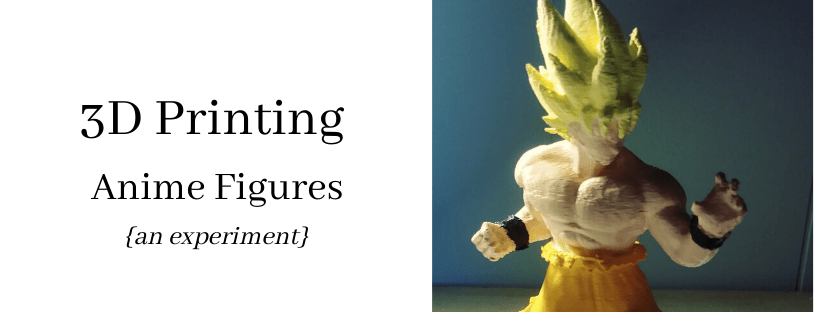
To make a 3D print, you need to first get a model. I downloaded this high-polygon Goku figure. Thingiverse models vary in quality. Sometimes you have to flip normals and do other tweaks to avoid holes when you print. Slicing software doesn’t always catch these problems. Fortunately, I didn’t have any problems with this model. I used 20% infill and 0.175 mm layers. Infill determines how dense the interior of the print is (and how much filament you use) and the layers determines the print quality. My printer can go to 0.05 millimeter layers, which would make for a decent finish. But this will also increase the time and filament. Because this was an experiment I opted for speed and reasonable quality. At the settings I used, it took 12 hours to print. You can also use fine sandpaper or a drummel to buff out the rougher areas. I sanded down my print blocks, for example. so the printing patterns aren’t as visible.
I used the support setting to create the scaffold you see around the figure. My printer requires such supports. Fortunately, they are thin and easy to remove by hand and by X-Acto knife. My printer left rough areas on the underside of his arms and on his neck from where the scaffold bridged. I shaved these areas down with the knife and sanded them. At the finer print settings I surmise they wouldn’t be as rough looking. Fortunately, they appear on the undersides of the model so they hide well. By the way, Goku stands 6 inches tall with the base.
I painted the model with inexpensive acrylic paint. I just laid a simple flat coat. Depending on your project, you can add shading and other details, but remember that lighting will influence your paint’s appearance. I used two coats, and the model could use a third in places. I recommend you use white or light gray filament if you want to paint your models.
If you are considering buying a 3D printer, be careful. Some printers only work with certain brands of filament. If you try a different brand, the machine won’t recognize the spindle. The printer I have doesn’t care what brand I buy. However, it doesn’t offer the same quality settings and output as some of the more locked-in printers available in the same price range.
I enjoyed this experiment, and it makes me want to dust off my polymodeling skills to make my own characters. The only problem is the time it takes to relearn what I’ve forgotten and to make the models proper for printing. But at $2-6 for each 3D print, anime figure collectors may want to consider this an option. You can make your own poses and outfits or even characters that don’t have figures available. You can also make your own color themes. However, if this becomes wider-spread, especially as 3D printer quality improves, this could threaten the anime figure industry. But the competition could also reduce the prices and increase the quality of company-produced figures. You can even make your own ball-joint dolls that could be used for stop-motion animation. It is still too soon to know for certain how the anime community will adopt 3D printing or even if it will, but 3D printers offer exciting possibilities for tinkerers.


Hi! I loved your post, I want to know more about the 3D printer you used. I would appreciate if you could explain what specs you considered when choising the printer and how much you paid fot it. Thanks!
I considered the size of the print area in addition to the layer height the printer could do. Speed didn’t really concern me since I mainly wanted the printer to make “woodblocks” for ink printing, but speed might be a important for you. Mine was refurbished and ran around $300.